Beocord 506

Before there was magnetic tape, there were magnetic wire recordings using a 0.1 mm steel wire instead of plastic tape with a magnetic coating. However, the basic principle is the same.

I’ve spent the past couple of weeks getting a magnetic wire player/recorder up and running again – at least the playback part… This mechanism came out of a Beocord 506 UK. The 506 means that it was made by Bang & Olufsen in 1951. The U meant that it had a Universal power supply (220 AC or 220 V DC, since the mains power was not yet standardised in Denmark in those days…) and the K stood for Kuffert or portable case. Originally, it looked like this:
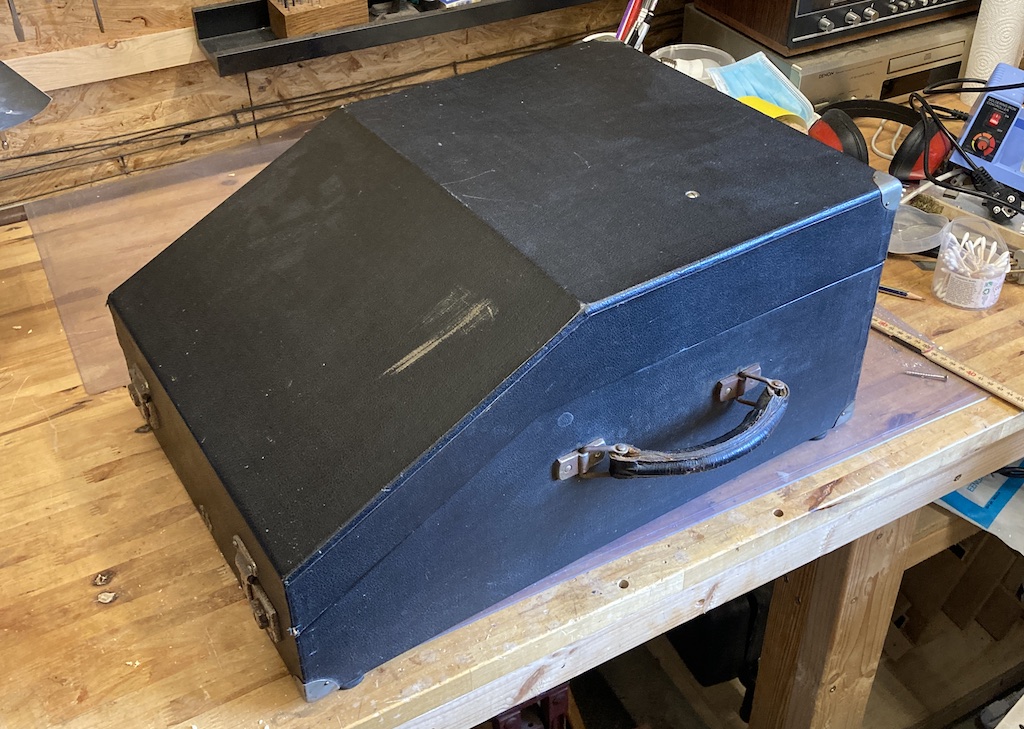
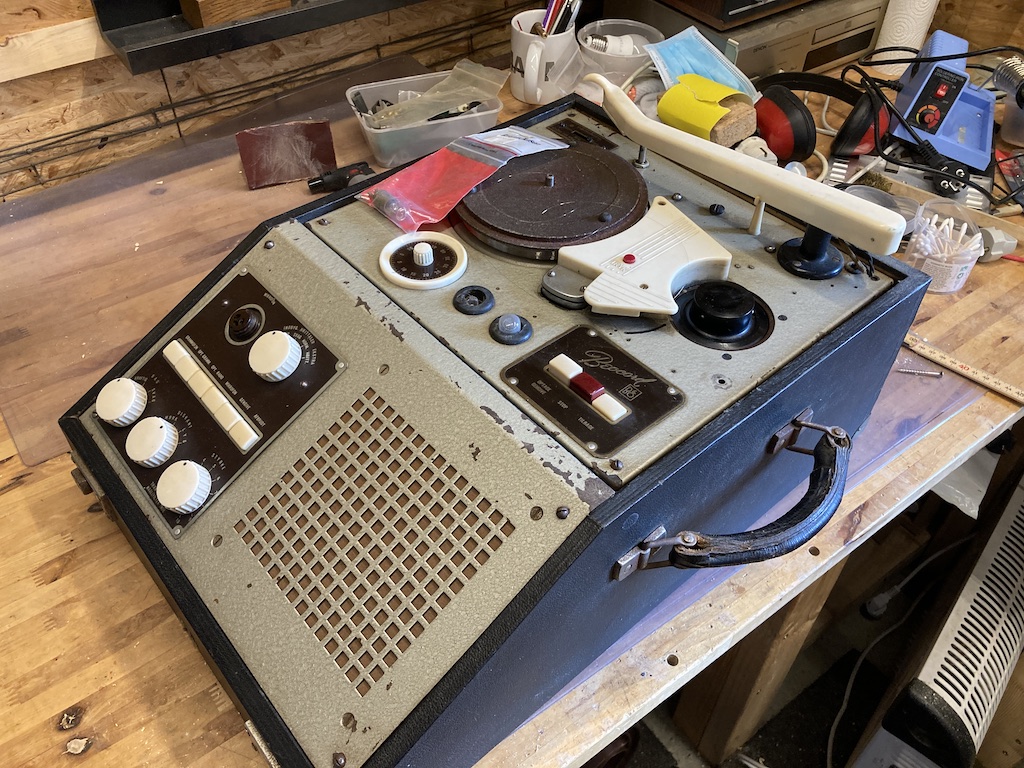
The Beocord 506UK incorporated a turntable with a fixed rotation speed of 78 RPM, with a mono output (of course…). The take-up spool of for the magnetic wire recorder doubled as the turntable platter, which makes it easy to ensure that it’s running at the correct speed (there’s an adjustment screw just on the other side of the white plastic plate on the top between the two wheels).

It was possible to record directly from the turntable output or from the microphone input (the connector is on the top left of the front panel). It had a built-in loudspeaker, so it was a stand-alone “portable” device.

My intention was only to get the magnetic player up and running – not to restore the entire device, so I donated all of the extra parts that I didn’t need to keep to a friend of mine who repairs and restores old B&O equipment.

Step 1 was to remove the player from the rest.
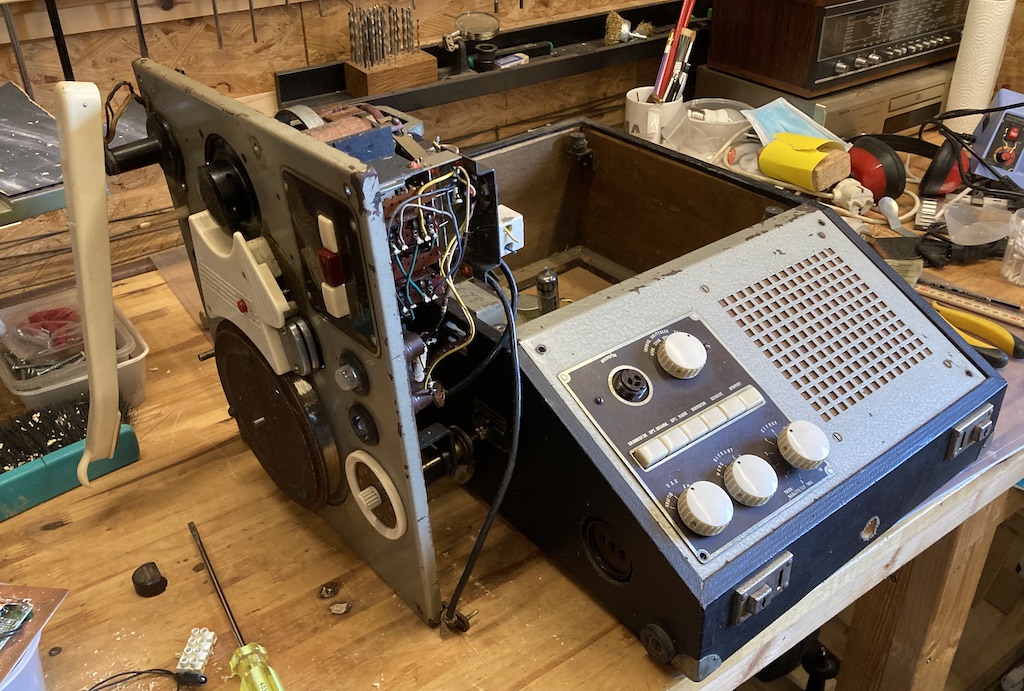
This means being a little careful, since that angled casing that you see on the right of the photo below is made of asbestos. Luckily, the nice people at the local dump know how to deal with this, so they were willing to take it off my hands as long as it was wrapped up in plastic.

As you can also see in the photo, back in the 1950s, B&O was still winding its own transformers.
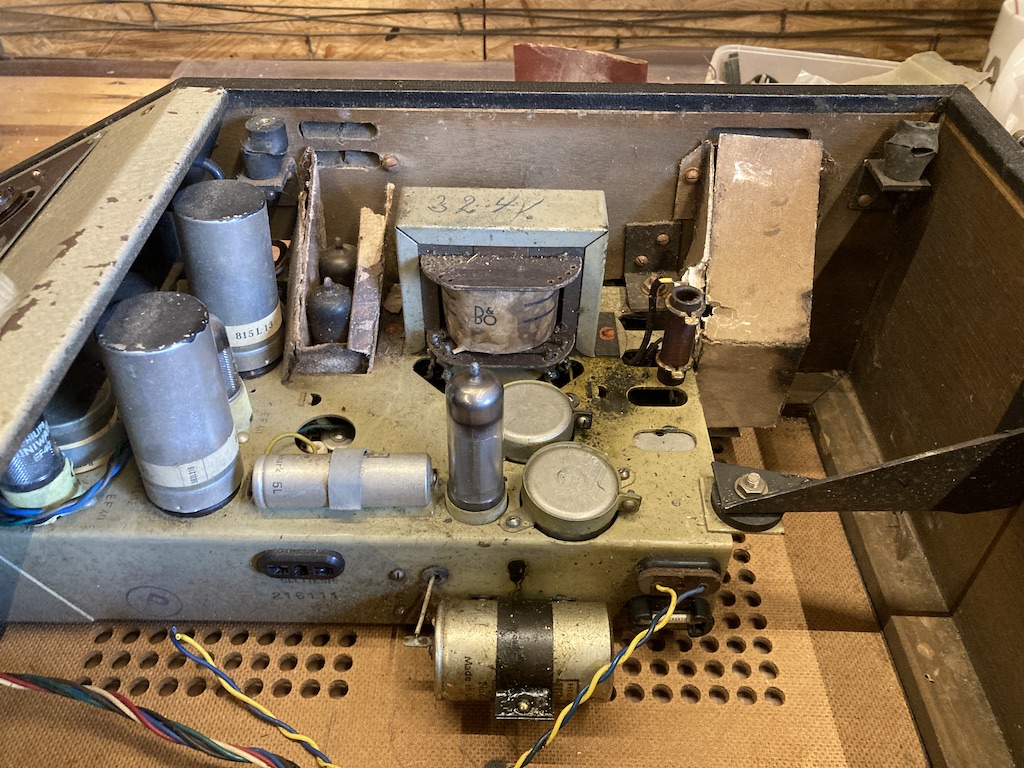
Back in those days, B&O also made its own custom loudspeaker drivers. This one is still in reasonably good condition, so I kept it with the plan to connect it to a small, modern amplifier for listening to the magnetic wire recordings.
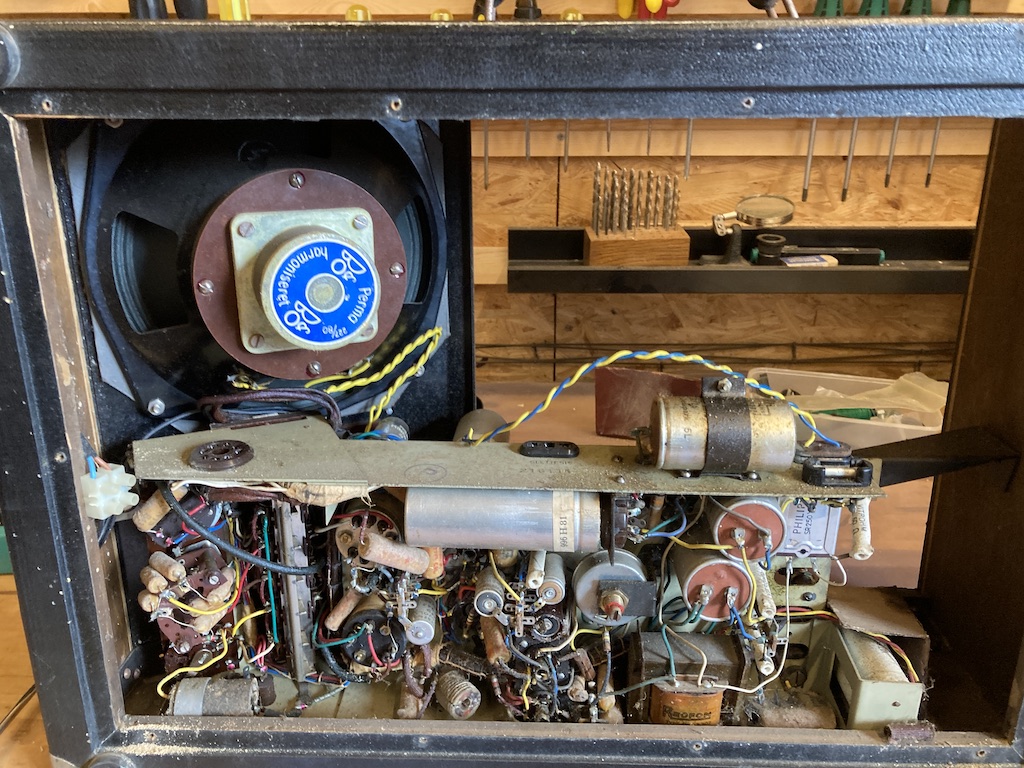
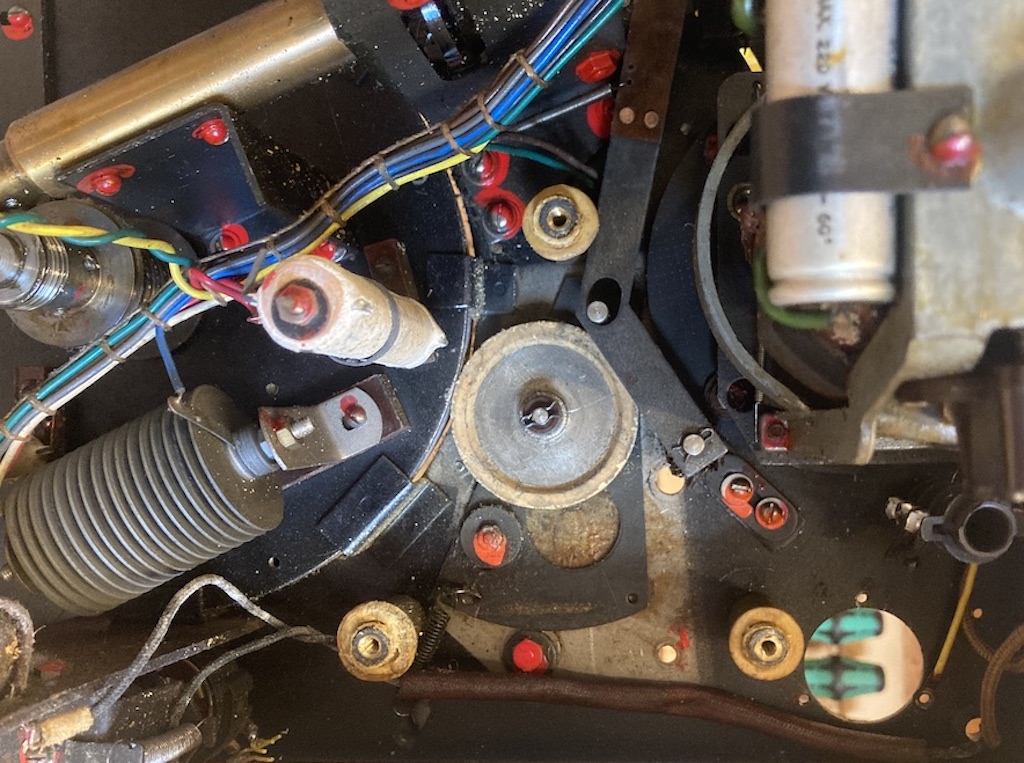
One problem with these old Beocord players is in the idler wheel that sits between the motor drive shaft and the outside edge of the take-up spool. This is the metal wheel with the white rubber edge in the middle of the photo below. The problem is that, over the past 70 years, this rubber has not only shrunk, but it has hardened, so there’s no friction to drive the spool.
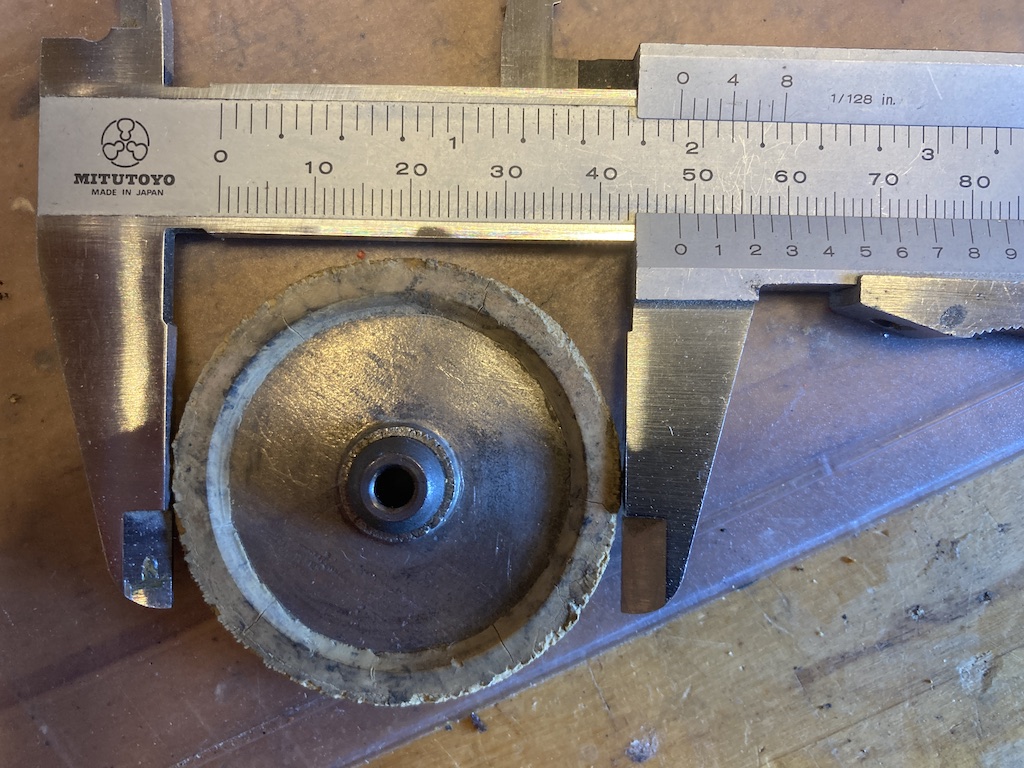
One solution to this is to put the wheel on a lathe, reduce the diameter of the (now hard) rubber, and glue on an elastic band. This strategy works well, however, I took a different path. I first got a rough measurement of the outside diameter of the wheel as a starting point.
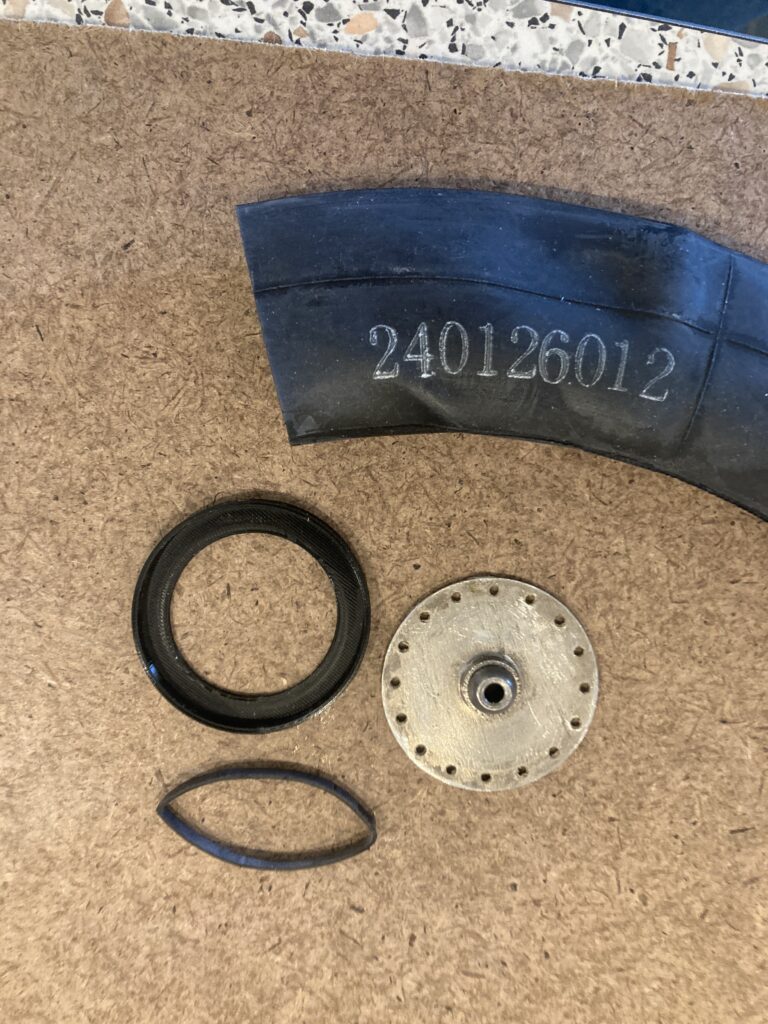
I then cut, filed, and sanded off all of the old rubber. I 3D printed a new edge ring which is glued to the metal wheel. I then cut a strip out of a bicycle inner tube and glued that to the edge. I used Loctite Extreme for both, since it works on metal, plastic, and rubber, and remains flexible after curing. The truth is that this took me 4 attempts to get things working correctly. The last version needed only a 0.5 mm reduction in the diameter to get it behaving.
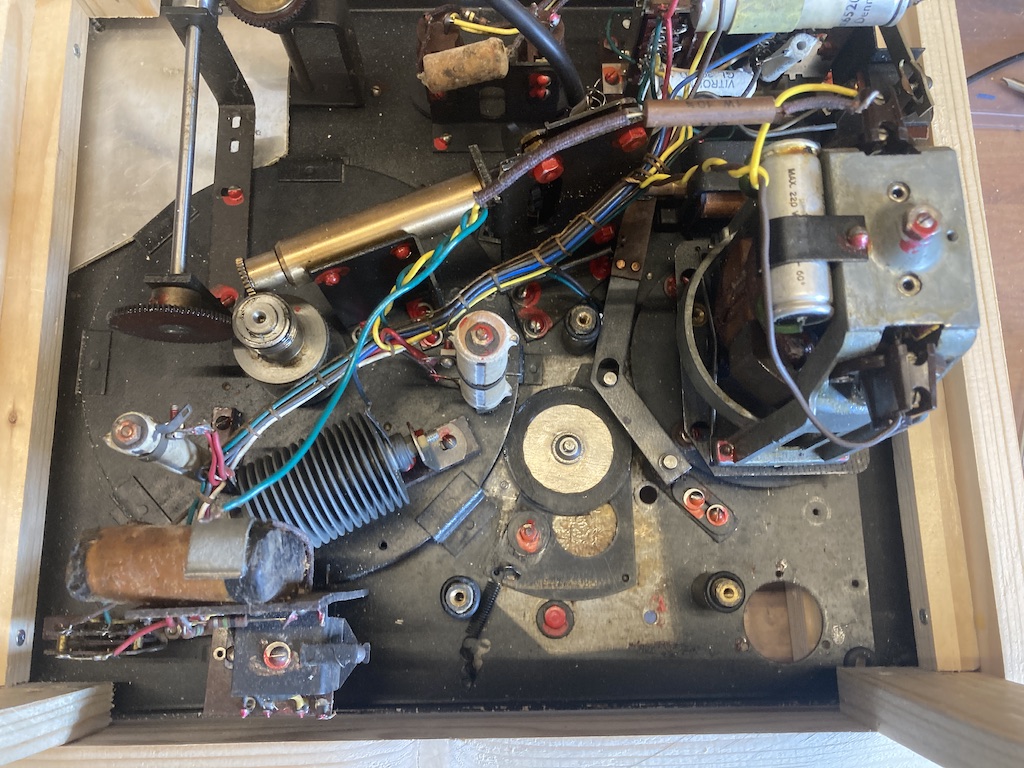
The “new” idler wheel can be seen in the photo below, back on its axle. It sits on a triangular plate that is able to move a millimeter or two.

When playing a wire, the spring on the bottom-middle of the photo pulls the idler wheel against the edge of the take-up spool (the large circle on the left) and the axle of the motor (which has been removed in this photo).

When rewinding, the L-shaped arm is pulled to the right by an electromagnet, which pulls the triangular plate slightly upwards and to the right (in this photo). This reduces the amount of friction on the take-up spool, but still provides enough tension pulling against the rewind motor to keep the magnetic wire from spooling out of control and turning into a bird’s nest.
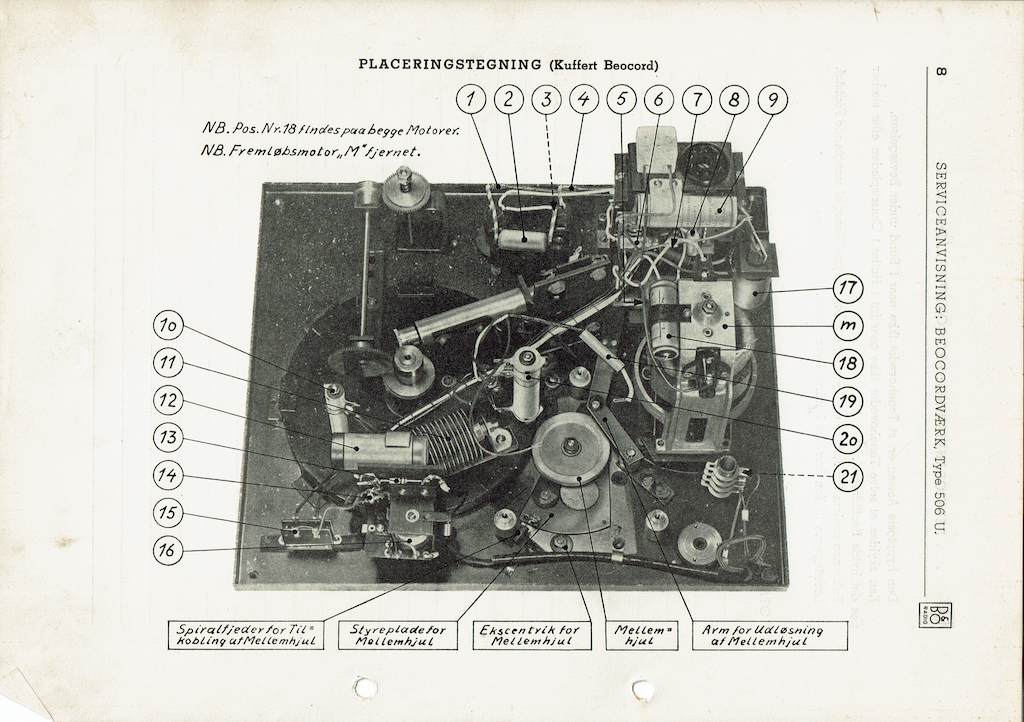
For reference, this is the photo from the original technical service manual. “Idler wheel” in Danish is “Mellem hjul”. The L-shaped arm is indicated in the manual as an “Arm for Udløsning af Mellemhjul” – or “Idler wheel release lever”.
The final result can be see in the video below. I’ve connected the output of the playback head to a standard RIAA preamplifier. It doesn’t have exactly the same response as the original, but it’s close enough. The output of the RIAA is connected to the analogue input of a Beoplay A1, which is what you’re listening to.

Notice that there is a mechanical link between the rotation of the take-up spool and the vertical position of the head. This ensures that the wire doesn’t bunch in the middle of either spool when you’re playing or rewinding. Also note that there is no “fast-forward” option. You only have PLAY, STOP, and REWIND. Due to the way I’ve wired up the head, it’s possible to listen to the output as you’re re-winding, however, this would be muted in the original Beocord.

Also note that I’m using an isolation transformer for the mains power – mostly to ensure that I don’t get electrocuted when I touch things, but also as a backup circuit breaker.

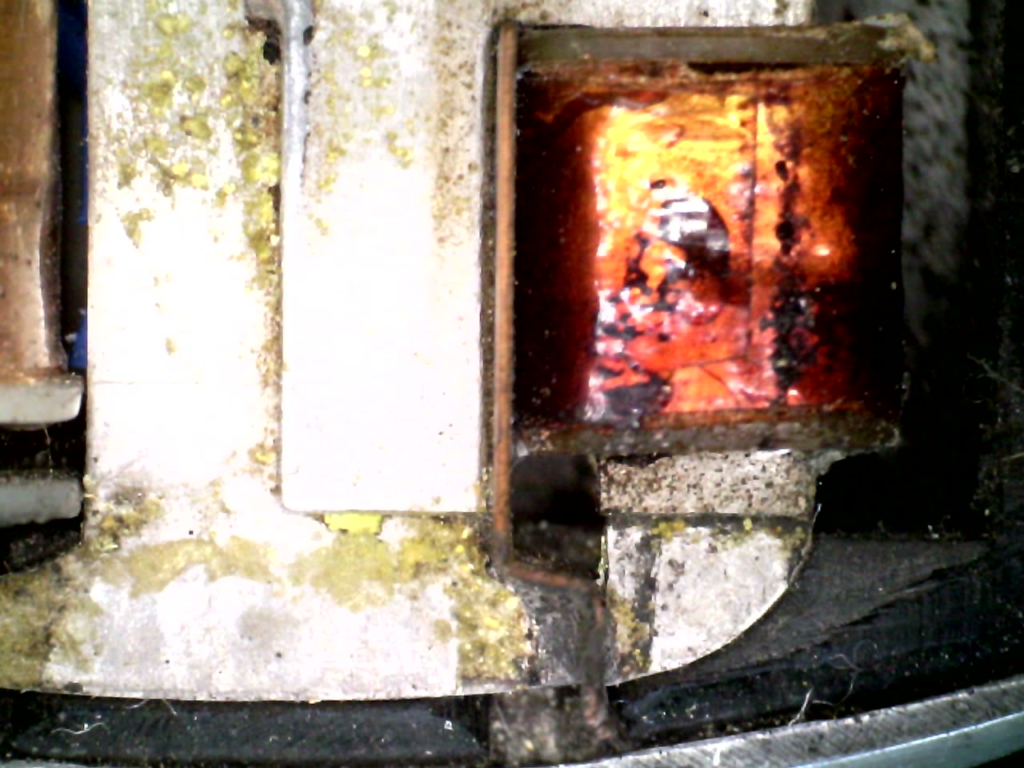
While I had things apart, I also used a USB microscope to take a look at the details in the playback head. Some of those photos are shown below.

The photo below shows the right side of the playback head looking down from the top. The wire runs in a groove along the front of the head which is the curve on the bottom of the photo. The coil of wire inside the orange lacquer generates a small electrical current when there is a change in the magnetic field in the gap directly below it.
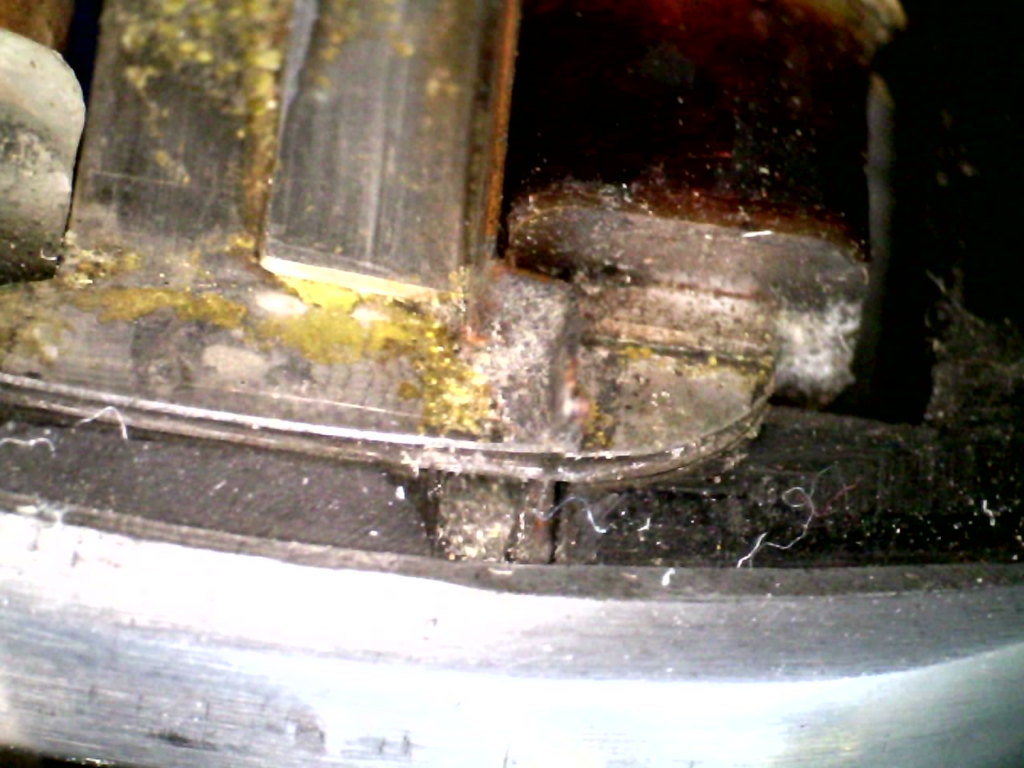
The photo below shows the same coil, looking from the front a little more. The gap is too small to be seen in this photo, but it’s at the location of the small discontinuity in the nice curve with the groove in it.
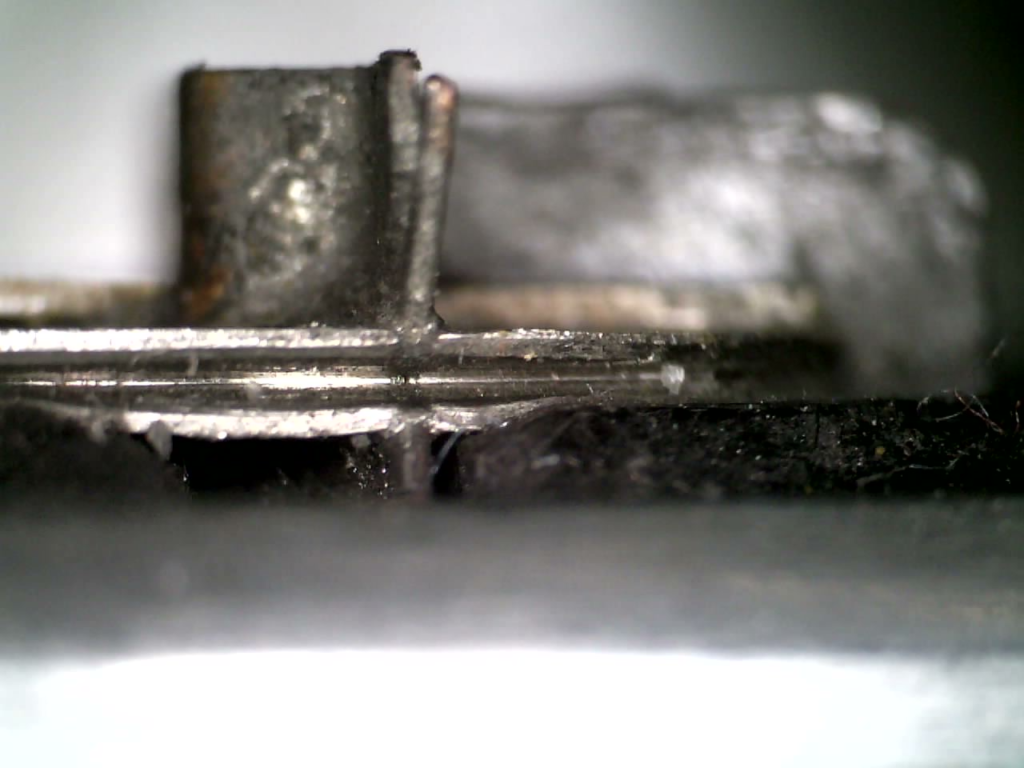
The photo below is looking directly into the front of the groove. The blurry silver shape in the upper right is the front of the coil shown above.
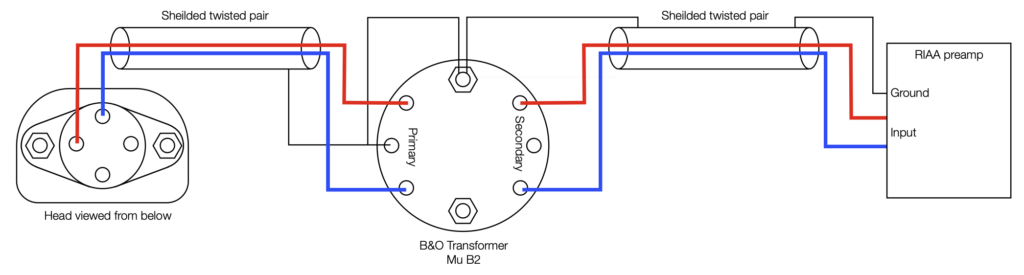
If you’re planning on doing this as well, then the wiring schematic below might help. There’s quite a bit of EMI from the motor, so try to leave as little wire as possible exposed outside the shielding on the various connection points.
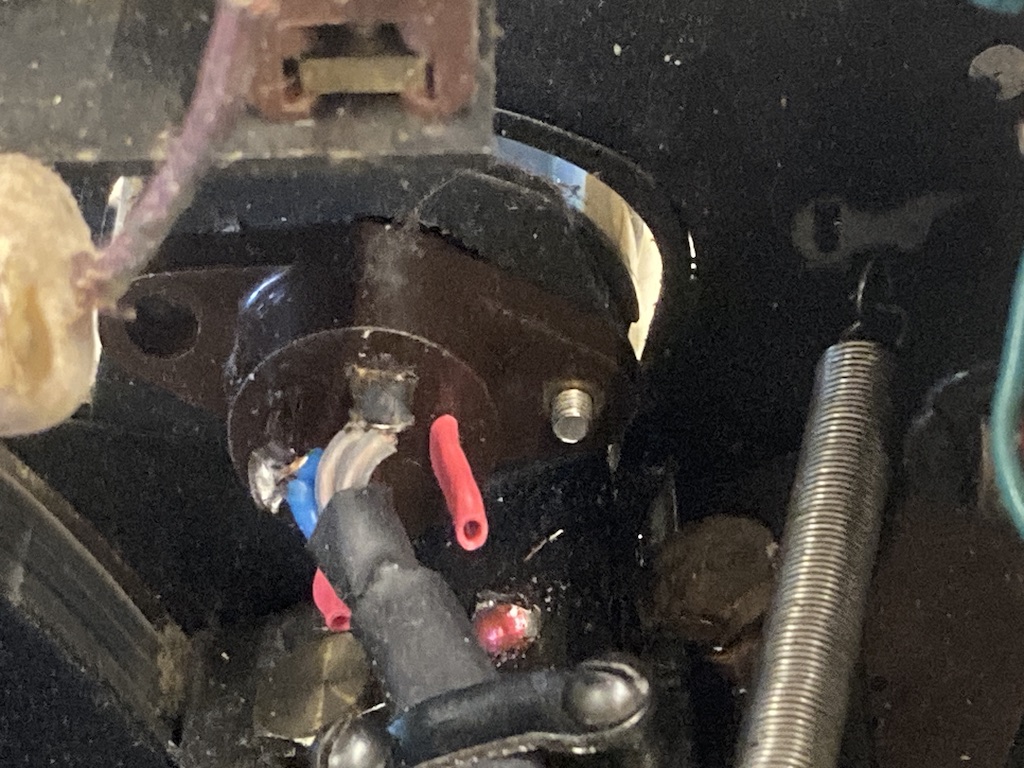
The photo below shows the connections under the head. I used star-quad cable, which is why there are two conductors soldered in parallel. Note the the shield is NOT connected to the head.
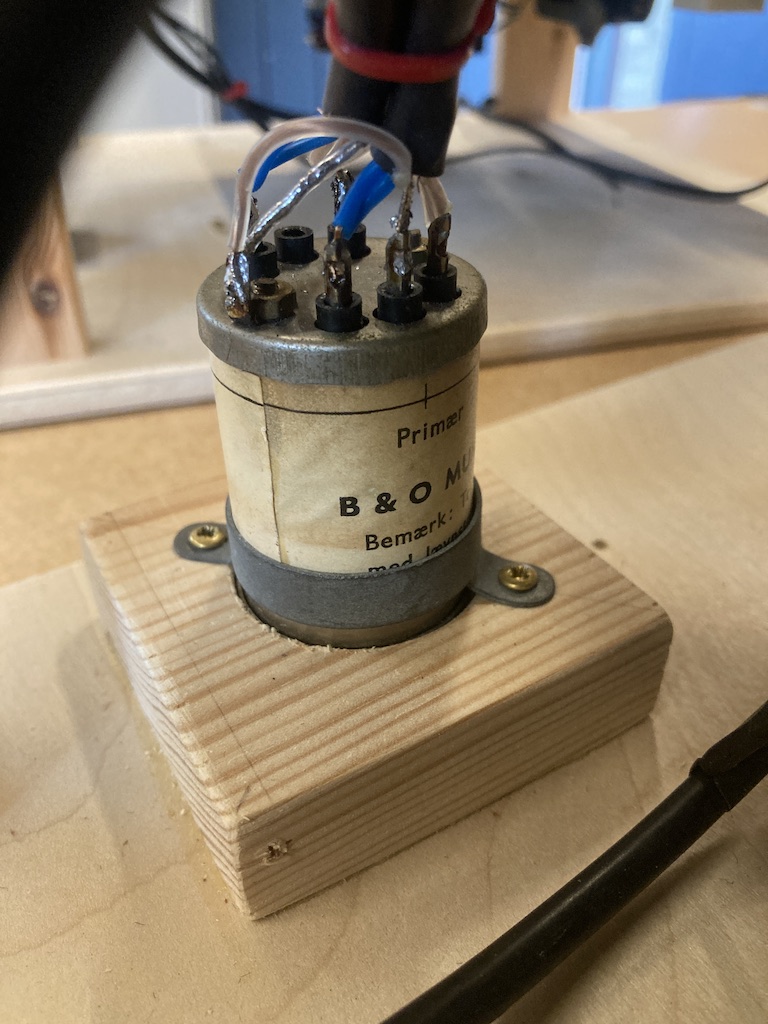
As you can see in the photo above, I wasn’t too careful about getting the shielding all the way down to the transformer. However, this is working well enough for my purposes.
Imitation is the highest form of flattery

We attended a concert last week at the Danish Guitar Camp, where Carlo Marchione played a collection of music written for various instruments in the 1700s. One of those pieces was an arrangement of the Adagio from Mozart’s Klaviersonate in B-Major K. 570, which I had never heard before.

As soon as he started, I thought…. waitaminute…. this tune sounds awfully familiar… as a Canadian…

wait… what?

Have a listen to the first 10 seconds of the Mozart, then listen to the first 10 seconds of the Canadian National Anthem. I suspect that Calixa Lavallée might have had the Mozart tune in the back of his head when he sat down to work on Théodore Robitaille’s commission.

Data sonification

Back when I was at McGill, one of my fellow Ph.D. students was Mark Ballora, who did his doctorate in converting heart rate data to an audible signal that helped doctors to easily diagnose patients suffering from sleep apnea.

This article from Science magazine in 2017 talked about Mark’s later work sonifying astronomical data, but I was reminded of it in a recent article on the BBC about researchers doing the same kind of work.

The Phono Gram

Late-night free-floating anxiety is not a modern phenomenon. One of my favourite descriptions of it is Dorothy Parker’s 1933 short story called “The Little Hours”, published in The New Yorker.

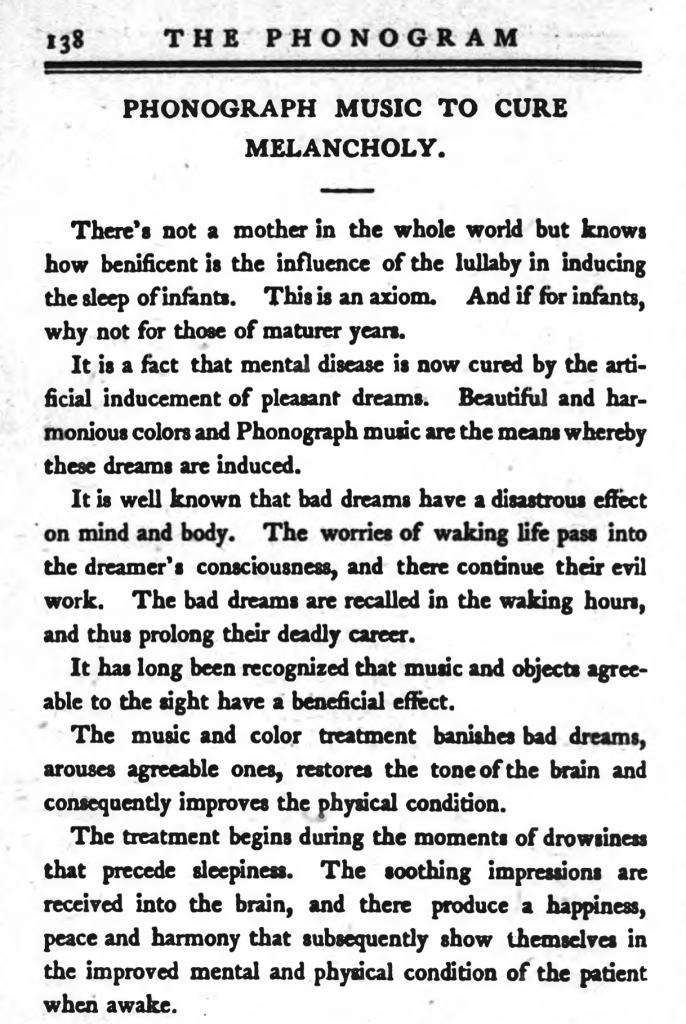
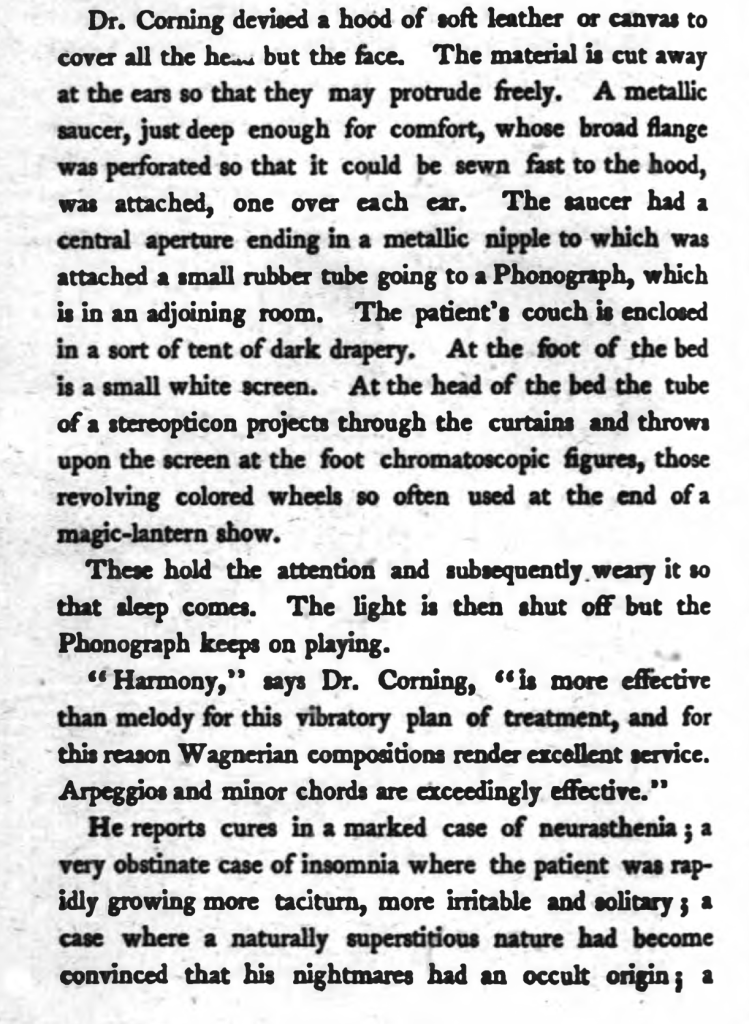
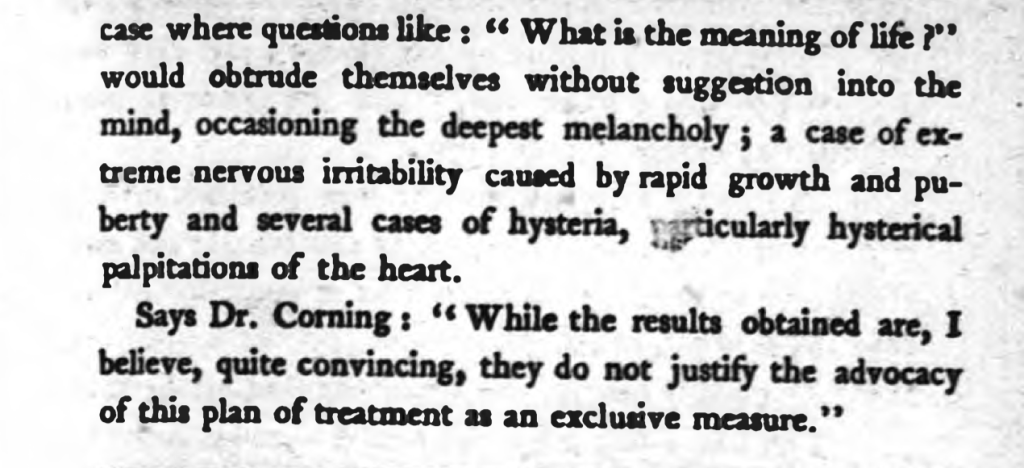
However, more than 30 years before this, The Phono Gram magazine published the following, which a Dr. J. Leonard Corning proposed to cure the problem of late-night melancholy with what we would, today, called a “pair of headphones” (although the design that he describes probably wouldn’t sell well to anyone who is not interested in S&M…) playing Wagnerian arpeggios and minor chords. (Personally, I just put the timer on my iPhone to turn off after 30 minutes, and turn on an old episode of “QI” or “8 Out of 10 Cats Does Countdown” – Sean Lock’s voice drowns out my own internal ones.)

I’ve removed a rather significant portion here…

Loud speaker

I live in Denmark where people speak Danish. One interesting word that I use every day is “højtaler” which is the Danish word for “loudspeaker”. I say that this word is “interesting” because, just like “loudspeaker” it is actually two words glued together. “Høj” means “high” or “loud” and “taler” means “talker” or “speaker” (as in “the person who is doing the talking”).

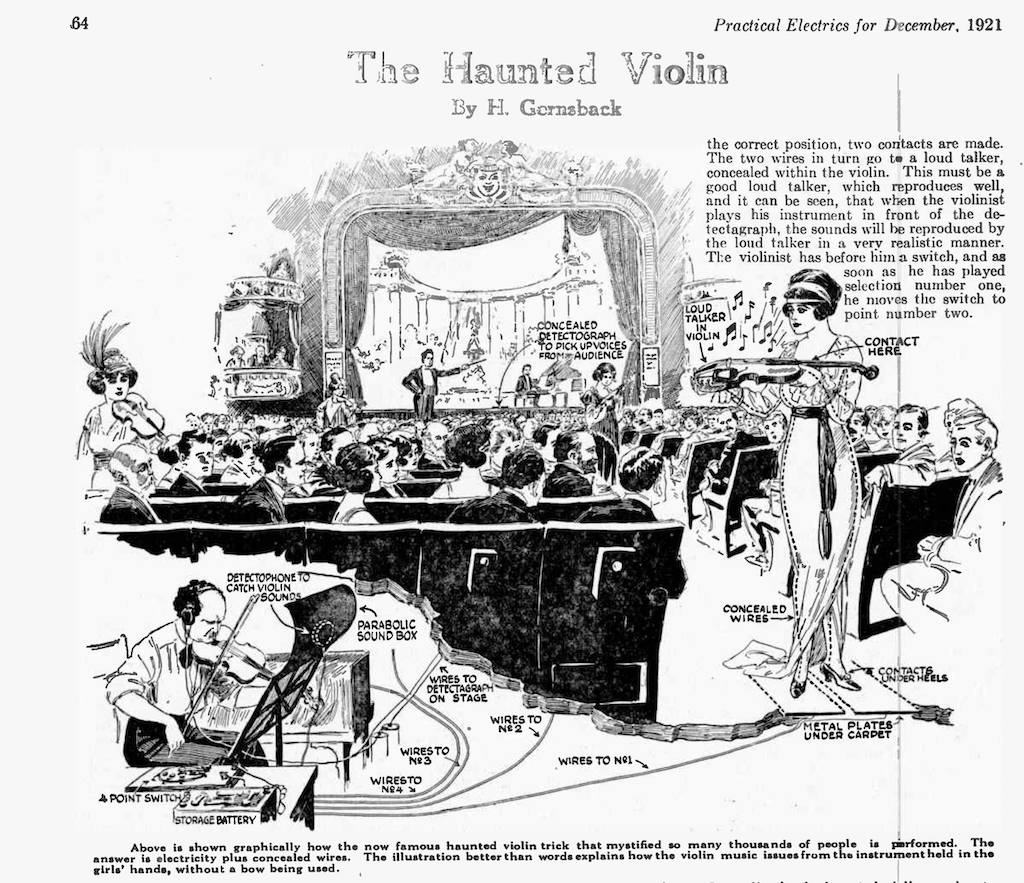
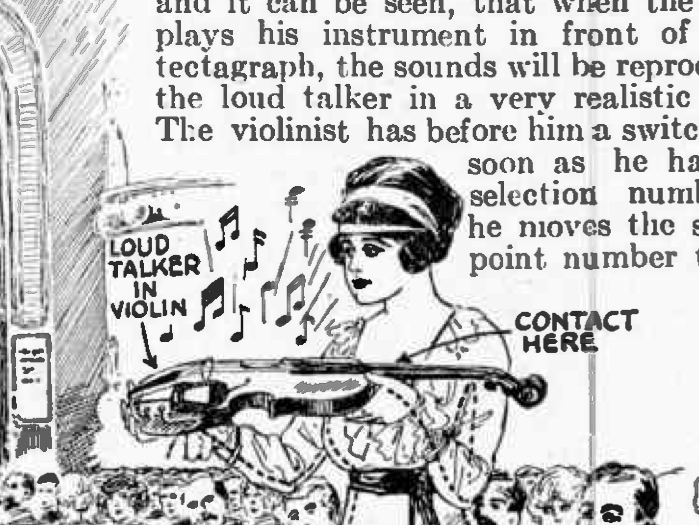
Sometimes, when I have a couple of minutes to spare, instead of looking at cat videos on YouTube, I sift through old audio and electronics magazines for fun. One really good source for these is the collection at worldradiohistory.com. (archive.org is also good!). Today I stumbled across the December, 1921 edition of Practical Electrics Magazine (which changed its name to The Experimenter in November of 1924 and then to Amazing Stories in April 1926*) It had a short description of a stage trick called the “Haunted Violin”, an excerpt from which is shown below.

The trick was that a violin, held by a woman walking around the aisle of the theatre would appear to play itself. In fact, as you can see above, there was an incognito violinist with a “detectophone” that was transmitting through wires connected to metal plates under the carpet in the theatre. The woman was wearing shoes with heels pointy enough to pierce the carpet and make contact with the plates. The heels were then connected with wires running through her dress to a “loud talker” hidden inside the violin.

Seems that, in 1921, it would have been easier to learn at least one word in Danish…

Side note: This is why, when I’m writing about audio systems I try as hard as possible to always use the word “loudspeaker” instead of “speaker”. To me, a “speaker” is a person giving a speech. A “loudspeaker” is a thing I complain about every day at work.

* That April 1926 edition of Amazing Stories had short stories by Jules Verne, H.G. Wells, and Edgar Allan Poe!

Post Script:
My wife reminded me that it’s the same in French: “haut-parleur”. It’s a reminder that the original loudspeakers were never intended for music, I suppose…

Volume controls vs. Output levels

#92 in a series of articles about the technology behind Bang & Olufsen

One question people often ask about B&O loudspeakers is something like ”Why doesn’t the volume control work above 50%?”.

This is usually asked by someone using a small loudspeaker listening to pop music.

There are two reasons for this, related to the facts that there is such a wide range of capabilities in different Bang & Olufsen loudspeakers AND you can use them together in a surround or multiroom system. In other words for example, a Beolab 90 is capable of playing much, much more loudly than a Beolab 12; but they still have to play together.

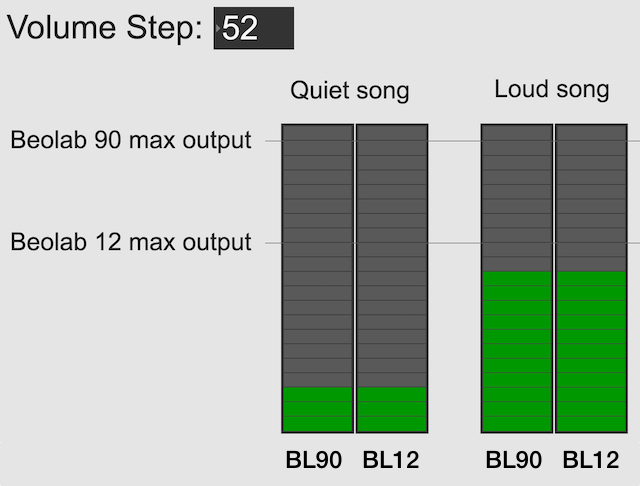
Let’s use the example of a Beolab 90 and a Beolab 12, both playing in a surround configuration or a multiroom setup. In both cases, if the volume control is set to a low enough level, then these two types of loudspeakers should play at the same output level. This is true for quiet recordings (shown on the left in the figure below) and louder recordings (shown on the right).

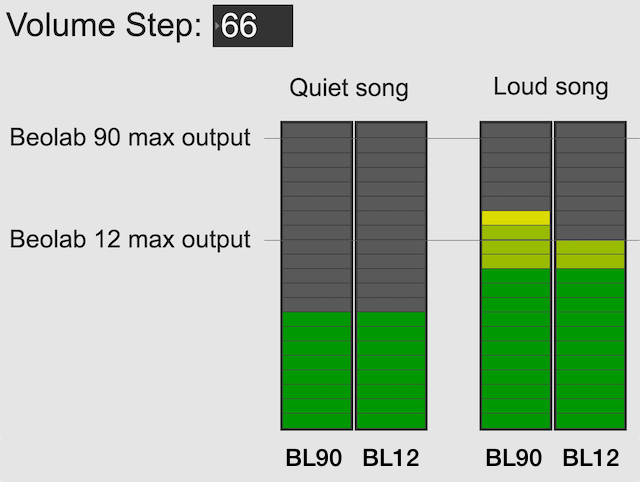
However, if you turn up the volume control, you will reach an output level that exceeds the capability of the Beolab 12 for the loud song (but not for the quiet song), shown in the figure below. At this point, for the loud song, the Beolab 12 has already begun to protect itself.

Once a B&O loudspeaker starts protecting itself, no matter how much more you turn it up, it will turn itself down by the same amount; so it won’t get louder. If it did get louder, it would either distort the sound or stop working – or distort the sound and then stop working.

If you ONLY own Beolab 12s and you ONLY listen to loud songs (e.g. pop and rock) then you might ask “why should I be able to turn up the volume higher than this?”.

The first answer is “because you might also own Beolab 90s” which can go louder, as you can see in the right hand side of the figure above.

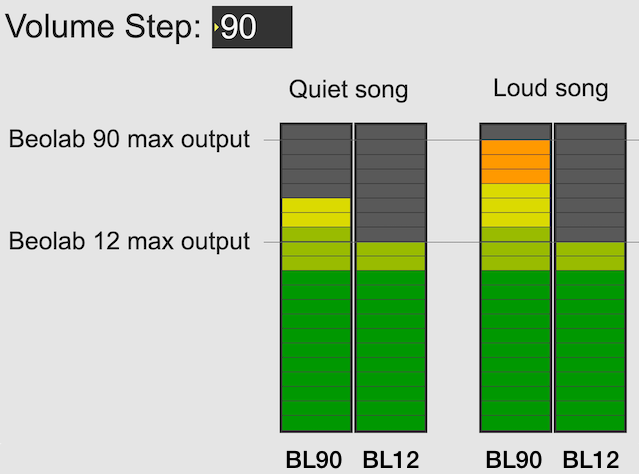
The second answer is that you might want to listen to quieter recording (like a violin solo or a podcast). In this case, you haven’t reached the maximum output of even the Beolab 12 yet, as you can see in the left hand side of the figure above. So, you should be able to increase the volume setting to make even the quiet recording reach the limits of the less-capable loudspeaker, as shown below.

Notice, however, that at this high volume setting, both the quiet recording and the loud recording have the same output level on the Beolab 12.

So, the volume allows you to push the output higher; either because you might also own more capable loudspeakers (maybe not today – but some day) OR because you’re playing a quiet recording and you want to hear it over the sound of the exhaust fan above your stove or the noise from your shower.

It’s also good to remember that the volume control isn’t an indicator of how loud the output should be. It’s an indicator of how much quieter or louder you’re making the input signal.

The volume control is more like how far down you’re pushing the accelerator in your car – not the indication of the speedometer. If you push down the accelerator 50% of the way, your actual speed is dependent on many things like what gear you’re in, whether you’re going uphill or downhill, and whether you’re towing a heavy trailer. Similarly Metallica at volume step 70 will be much louder than a solo violin recording at the same volume step, unless you are playing it through a loudspeaker that reached its maximum possible output at volume step 50, in which case the Metallica and the violin might be the same level.

Note 1: For all of the above, I’ve said “quiet song” and “loud song” or “quiet recording” and “loud recording” – but I could just have easily as said “quiet part of the song” and “loud part of the song”. The issue is not just related to mastering levels (the overall level of the recording) but the dynamic range (the “distance” between the quietest and the loudest moment of a recording).

Note 2: I’ve written a longer, more detailed explanation of this in Posting #81: Turn it down half-way.