Back to Part 2
Signal Levels
Every audio device relies on a rather simple balancing act. The “signal”, whether it’s speech, music, or sound effects, should be loud enough to mask the noise that is inherent in the recording or transmission itself. The measurement of this “distance” in level is known as the Signal-to-Noise Ratio or SNR. However, the signal should not be so loud as to overload the system and cause distortion effects such as clipping, which results in what is commonly called Total Harmonic Distortion or THD.(1) One basic method to evaluate the quality of an audio signal or device is to group these two measurements into one value: the Total Harmonic Distortion plus Noise or THD+N value. The somewhat challenging issue with this value is that a portion of it (the noise floor) is typically independent of the signal level, since a device or signal will have some noise regardless of whether a signal is present or not. However, the distortion is typically directly related to the level of the signal.
In modern digital PCM audio signal (assuming that it is correctly-implemented and ignoring any additional signal processing), the noise floor is the result of the dither that is used to randomise the inherent quantisation error in the encoding system. This noise is independent of the signal level, and entirely dependent on the resolution of the system (measured in the number of bits used to encode each sample). The maximum possible level that can be encoded without incurring additional distortion that is inherent in the encoding system itself is when the maximum (or minimum) value in the audio signal reaches the highest possible signal value of the system. Any increase in the signal’s level beyond this will be clipped, and harmonic distortion artefacts will result.
Figure 1 shows two examples of the relationship between the levels of the signal and the THD+N in a digital audio system. The red line shows a 24-bit encoding, the blue line is for 16-bit. The “flat line” on the left of the plot is the result of the noise floor of the system. In this region, the signal level is so low, it’s below the noise floor of the system itself, so the only measurable output is the noise, and not the signal. As we move towards the right, the input signal gets louder and raises above the noise floor, so the output level naturally increases as well. However, in a digital audio system, we reach a maximum possible input level of 0 dB FS. If we try to increase the signal’s level above this, the signal itself will not get louder, however, it will become more and more distorted. As a result, the distortion artefacts quickly become almost as loud as the signal itself, and so the plots drop dramatically.
This is why good recording engineers typically attempt to align the levels of the microphones to ensure that the maximum peak of the entire recording will just barely reach the maximum possible level of the digital recording system. This ensures that they are keeping above the noise floor as much as possible without distorting the signals.
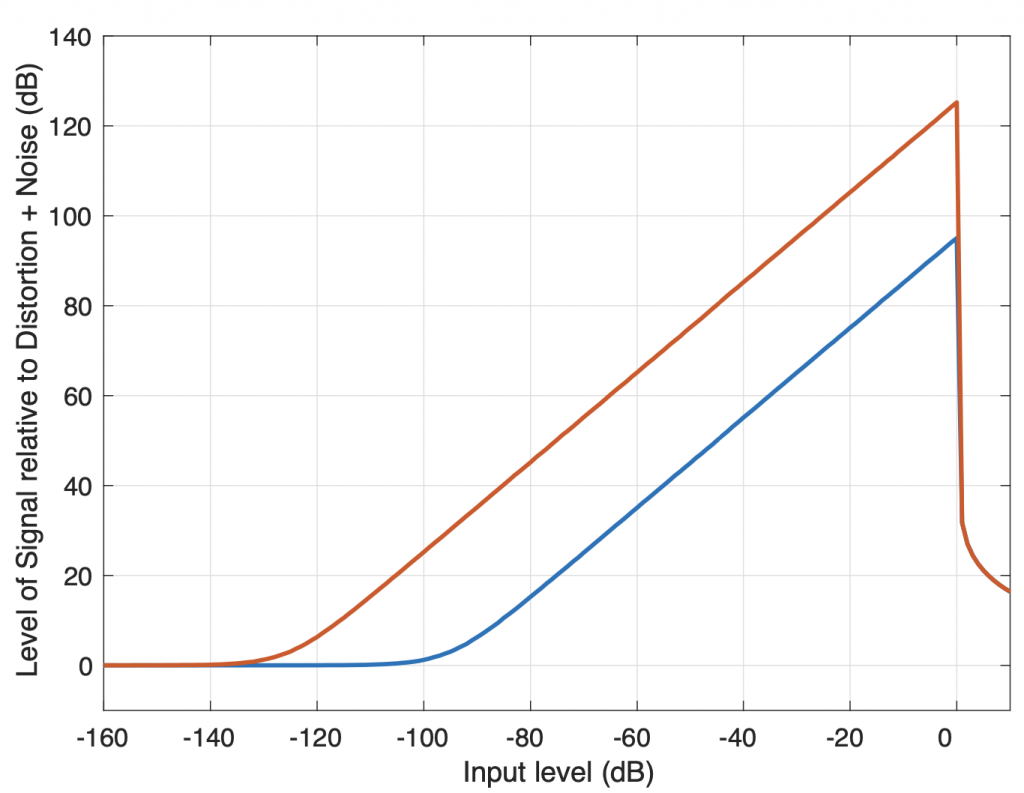
Audio signals recorded on analogue-only devices generally have the same behaviour; there is a noise floor that should be avoided and a maximum level above which distortion will start to increase. However, many analogue systems have a slightly different characteristic, as can be seen in the idealised model shown in Figure 2. Notice that, just like in the digital audio system, the noise floor is constant, and as the level of the input signal is increased, it rises above this. However, in an analogue system, the transition to a distorted signal is more gradual, seen as the more gentle slopes of the curves on the right side of the graph.

As a result, in a typical analogue audio system, there is an “optimal” level that is seen to be the best compromise between the signal being loud enough above the noise floor, but not distorting too much. The question of how much distortion is “too much” can then be debated — or even used as an artistic effect (as in the case of so-called “tape compression”).
If we limit our discussion to the stylus tracking a groove on a vinyl disc, converting that movement to an electrical signal that is amplified and filtered in a RIAA-spec preamplifier, then a phonograph recording is an analogue format. This means, generally speaking, that there is an optimal level for the audio signal, which, in the case of vinyl, means a modulation velocity of the stylus, converted to an electrical voltage.
Although there are some minor differences of opinion, a commonly-accepted optimum level for the groove on a stereo recording is 35.4 mm/sec for a single audio channel at 1,000 Hz. In a case where both audio channels have the same 1 kHz signal recorded in phase (as a dual-monophonic signal), then this means that the lateral velocity of the stylus will be 50 mm/sec.(2)
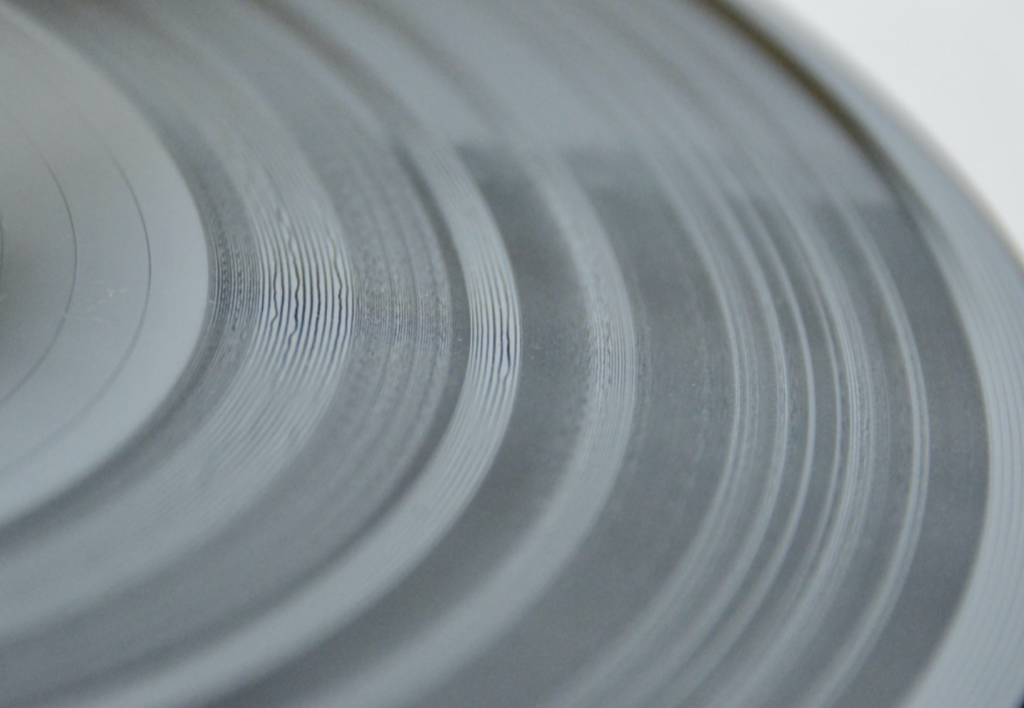
Of course, the higher the modulation velocity of the stylus, the higher the output of the turntable. However, this would also mean that the groove on the vinyl disc would require more space, since it is being modulated more. This means that there is a relationship between the total playing time of a vinyl disc and the modulation velocity. In order to have 20 minutes of music on a 12” LP spinning at 33 1/3 RPM, then it the standard method was to cut 225 “lines per inch” or “LPI” (about 89 lines per centimetre) on the disc. If a mastering engineer wishes to have a signal with a higher output, then the price is a lower playing time (because the grooves much be spaced further apart to accommodate the higher modulation velocity) however, in well-mastered recordings, this spacing is varied according to the dynamic range of the audio signal. In fact, in some classical recordings, it is easy to see the louder passages in the music because the grooves are intentionally spaced further apart, as is illustrated in Figure 3.
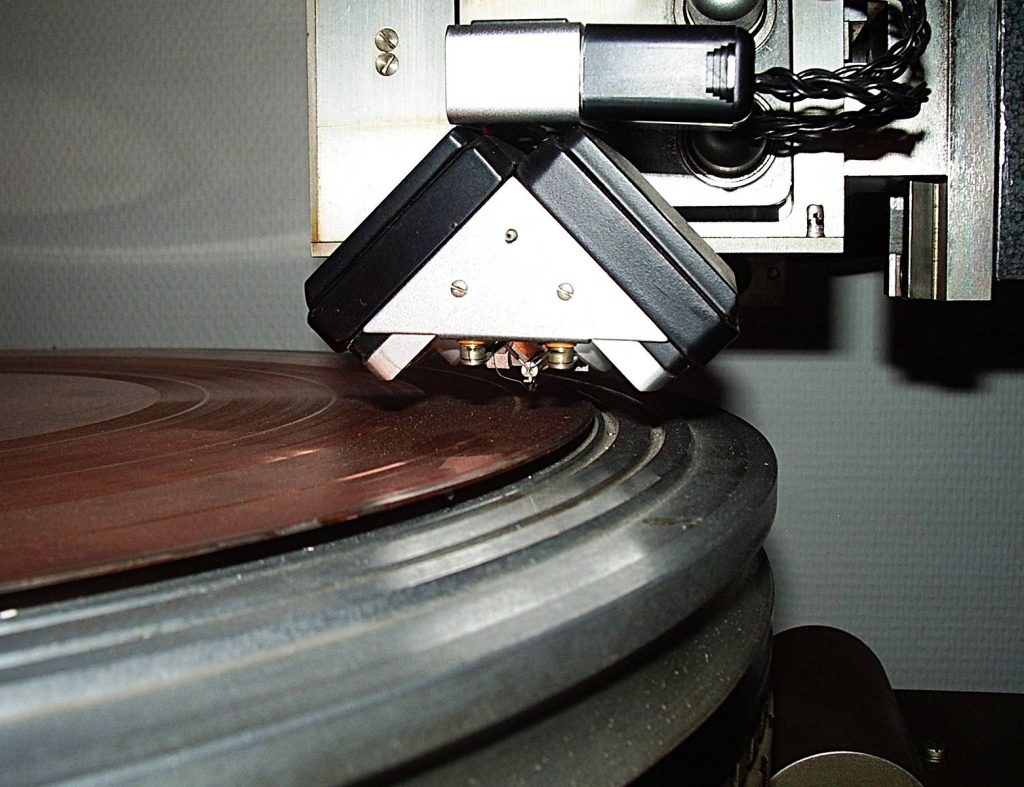
A large part of the performance of a turntable is dependent on the physical contact between the surface of the vinyl and the tip of the stylus. In general terms, as we’re already seen, there is a groove with two walls that vary in height, almost independently and the tip of the stylus traces that movement accordingly. However, it is necessary to get down to the microscopic level to consider this behaviour in more detail.
When a record is mastered (meaning, when the master disc is created on a lathe) the groove is cut by a heated stylus that has a specific shape, shown in Figure4. The depth of the groove can range from a minimum of 25 µm to a maximum of 127µm, which, in turn varies the width of the groove.(3)
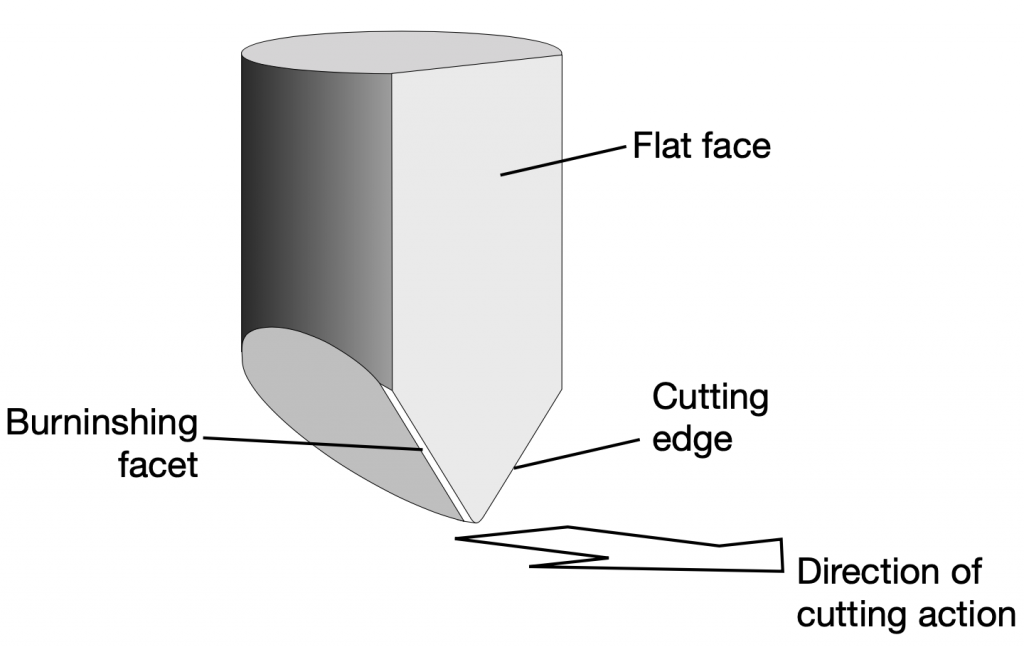
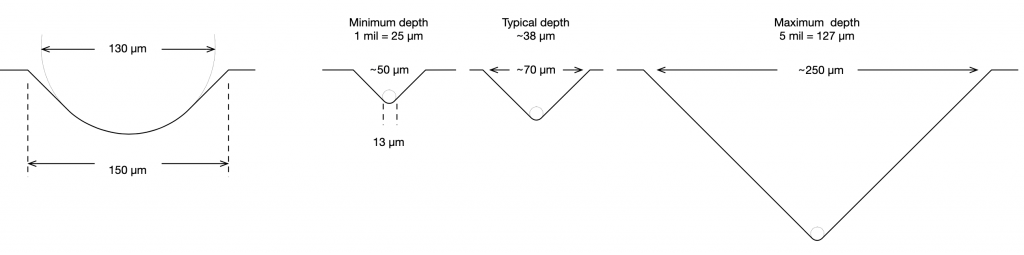
The result is a groove with a varying width and depth that are dependent on the decisions made by the mastering engineer, and a modulation displacement (the left/right size of the “wiggle”) that is dependent on the level of the audio signal that is being reproduced.
In a perfect situation, the stylus that is used to play that signal back on a turntable would have exactly the same shape as the cutting stylus, since this would mean that the groove is traced in exactly the same way that it was cut. This, however, is not practical for a number of reasons. As a result, there are a number of options when choosing the shape of the playback stylus.
Footnotes
- The assumption here is that the distortion produces harmonics of the signal, which is a simplified view of the truth, but an effect that is easy to measure.
- (35.4*2) / sqrt(2) because the two channels are modulated at an angle of 45 degrees to the surface of the disc.
- See “The High-fidelity Phonograph Transducer” B.B. Bauer, JAES 1977 Vol 25, Number 10/11, Oct/Nov 1977
On to Part 4