Today was spent doing a bunch of small jobs while I wait for some replacement parts to arrive.
For starters, I found two needles under the hinge on the bottom half of the case. They’ll come in handy later!
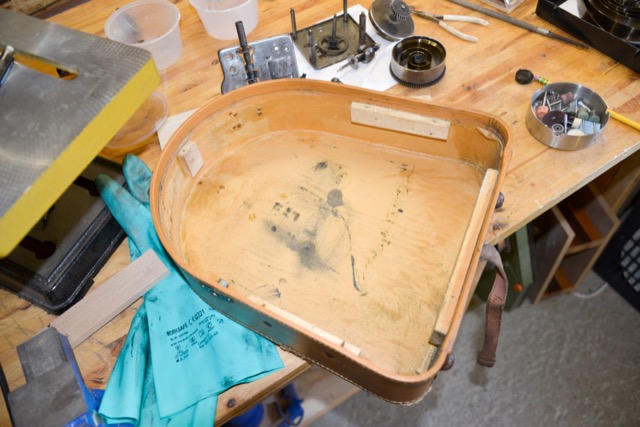
The interior of the case, showing the four wood blocks to which the top screws on. Funnily, these are made of three different types of wood: pine, birch, and beech. I suspect that this was not strategic – but just a question of using whatever was on-hand. The lining is a waxy paper – the black stains are grease that has dripped down from the drive mechanism.
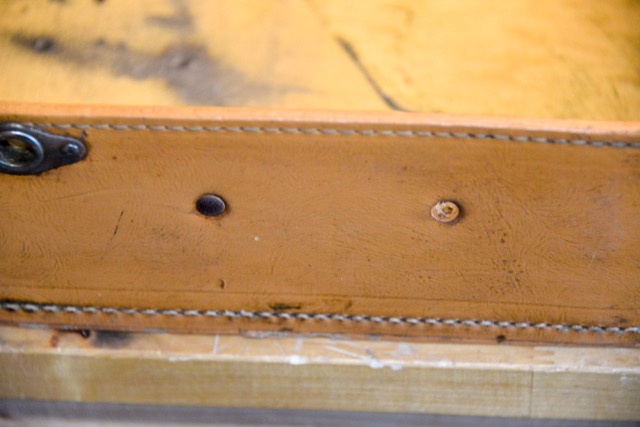
The four pieces of wood are two different heights from the top edge of the casing, although I suspect that this would have been custom-fitted. They’re attached to the outer casing using either tacks (the largest piece on the right) or split rivets that were bent over to lock the wood in place. The wood parts are not glued onto the case. All of the rivet and tack heads of these are badly rusted – so they’re coming out…

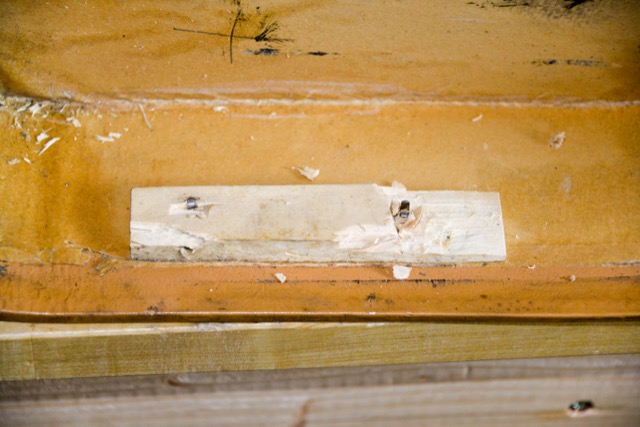
One of the split rivets after the wood has been removed. The wood did not survive the removal process. The hole on the far left is the opening for the crank.
The wood in the process of removal. I’ll just make new blocks to replace these…
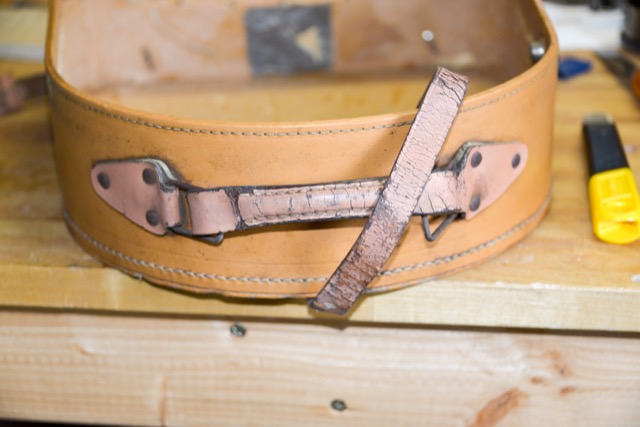
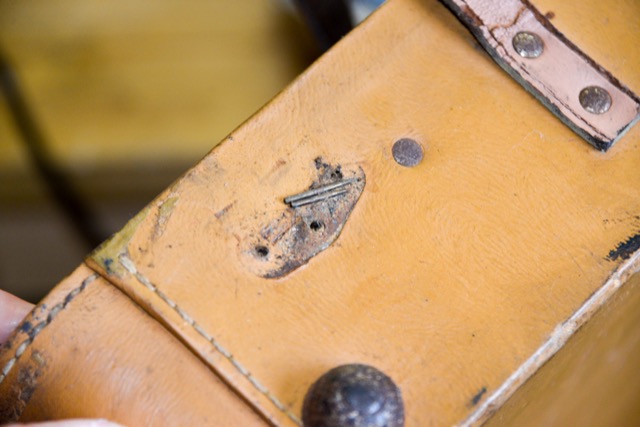
The handle and strap are a different colour than the case, and are in quite bad shape. In addition, the hardware is badly rusted. This will all get replaced with new parts.
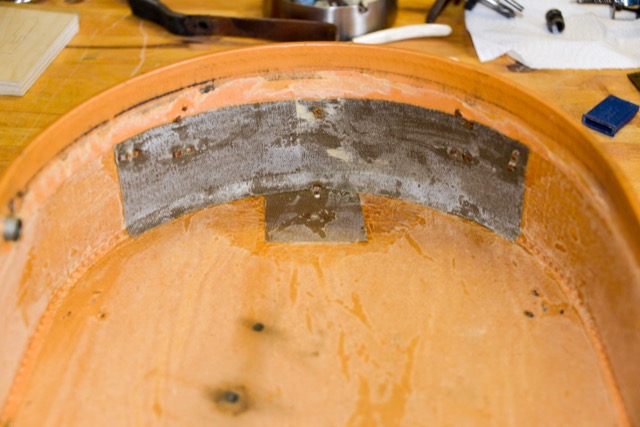
The handle and strap are attached with the same split rivets, but bent around a canvas material that’s glued to the inside of the case, as can be seen in the photo above. The canvas is the dark square and rectangle. This canvas can’t be seen normally, because it’s covered by the wax paper. I peeled this off, because I’ll be replacing it with something a little more sturdy.
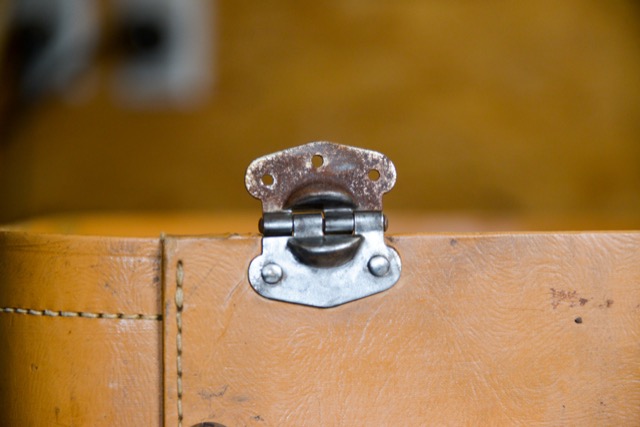
The rust on the exterior metal parts was cleaned up with a small wire brush on my Dremel tool. The before-and-after can be seen above. This took some time so as to not slip and carve into the case covering.
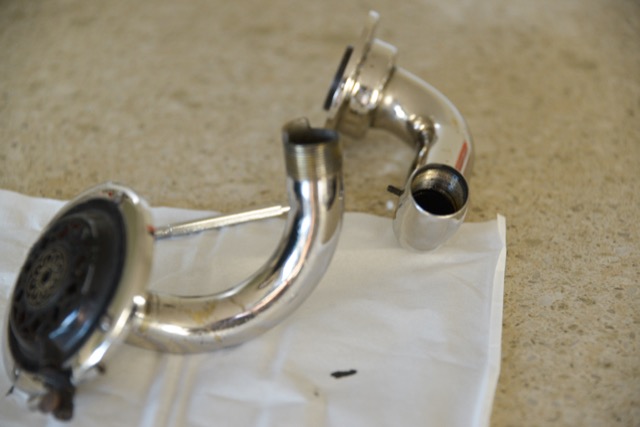
I used Simichrome to polish the metal tonarm. This appears to be plated brass. I’m not going to take apart the reproducer (the black part that holds the needle and contains the diaphragm).
If you look carefully, you’ll see a small set screw sticking out of the half of the tonearm on the right. That’s used to stop the front portion of the tonearm from making a full rotation when it’s swivelled back and forth onto the record, by hitting the portion of the threaded pipe that can be seen below.
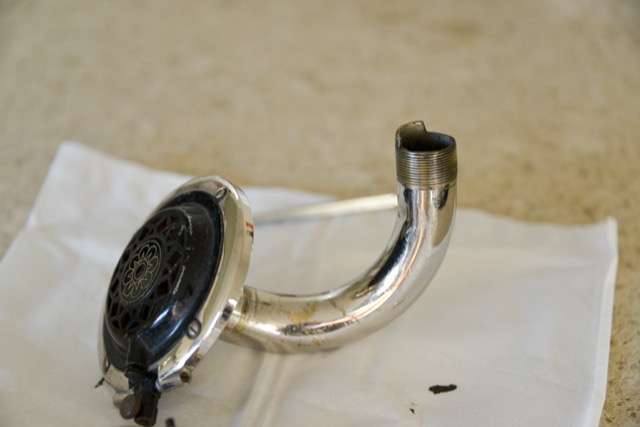
So, if you’re dismantling the tonearm, remember to back off the set screw before separating the two parts.
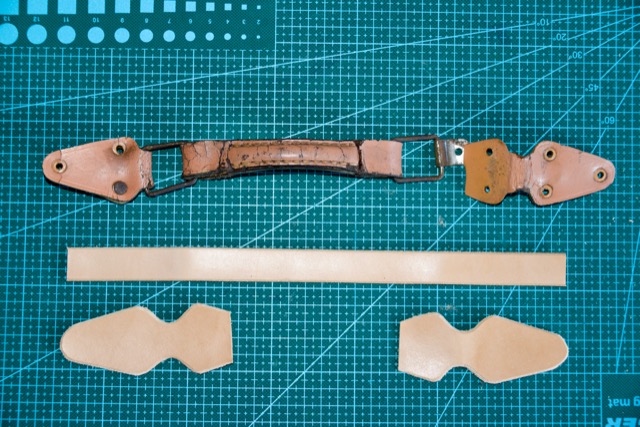
I also started the leather work to make a new handle and strap. The replacement hardware and dye were ordered from laederiet.dk, near Aarhus (which is where I buy all my leather supplies).
Apart from all of that, I washed the exterior of the case with dish soap and a soft cloth – not too wet because there are some places where the covering is worn through and I don’t want water getting in there.
I also sprayed the interior fabric (maybe taffeta?) with an enzyme spray and rubbed it gently to remove some of the stains. Too much rubbing frays the fabric, so I had to be gentle…